The Page Details define the name and description for the new page. It will provide context and navigation for your end users running the new reporting page. This process is identical for both standard custom reports as well as custom data entry pages.
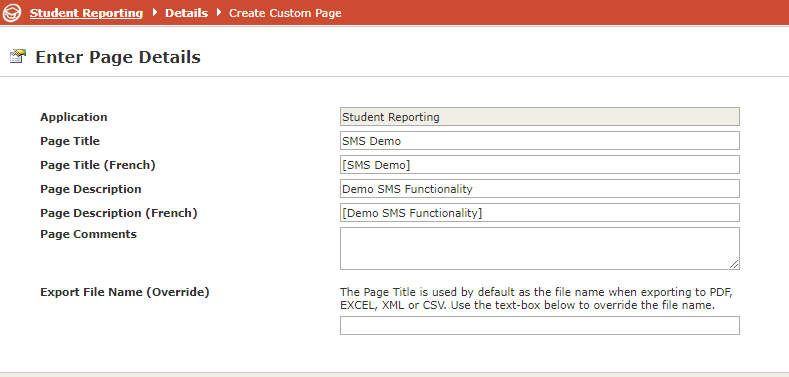
Select the FAST Application you want to create the report in from the drop down list. The Application Name will be displayed in the Page Header of the reporting page. This is only available when creating custom pages at the Site Admin level. Most administrators working within a FAST application will not need to complete this step.
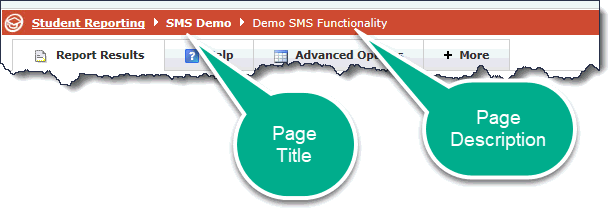
Type the Page Title Language 1. The Page Title will appear in the Page Header of the reporting page. If your institution uses a second language, type the Page Title Language 2 in the space provided.
Type the Page Description for Language 1 and Language 2 (if your institution uses a second language). The Page Description will also appear in the Page Header of the reporting page.
Page Comments are used primarily in the Manage Reporting Pages Administration and is intended for those tasked with approving the Custom Reporting pages. It could include details such as why the report was created, who the intended audience will be, etc.
Export File Name Override (optional): This field should only be used if you wish for the exported file name to differ from the Page Title that you have used. In general, this is not recommended.
When you have filled out the details, Click Next to proceed to the next step:
Select Your Query for a Custom Reporting Page
|
|
|