The Page Label Admin settings can be edited at the Administration level for the application; it can also be accomplished at the Reporting Page level.
To access the controls, select Administration from the main menu, select Layout and then select Page Labels.
On the Filter Options Page, the application will default into your query and the remaining fields are all optional:

The Page Name can be selected to limit the query to a particular reporting page within the application.
The Page Title and/or Page Title (French) fields can be included (optional).
Execute your query.
The page will display as a modified Data Entry Grid page; you can make edits on this page but you cannot insert new records. The page is divided into two main categories of data:
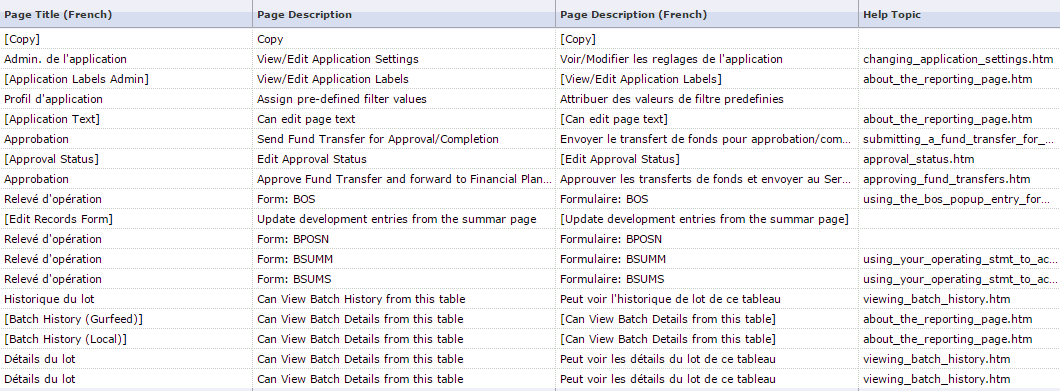
The Text Fields:

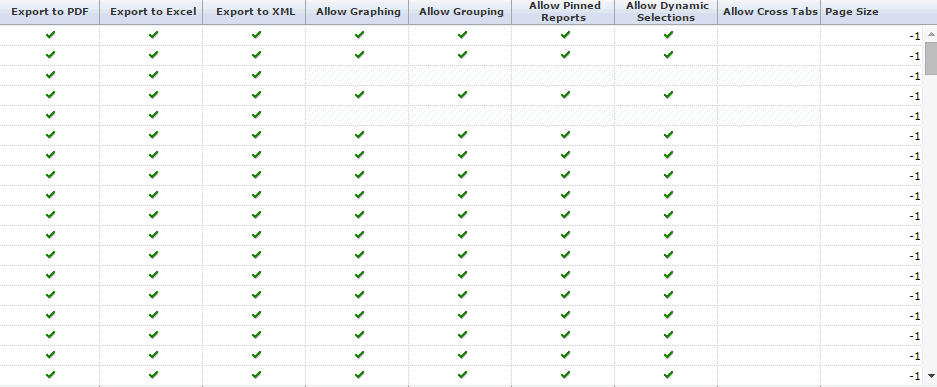
And the Indicator/Option Fields:

The data grid allows you to click your cursor in any of the editable cells which are white, rather than struck through with a grid-like pattern. This includes:
Page Title: This is the English text that will display to your end users as the Title for this reporting page.
Page Title (French): This is the French text that will display to your end users as the Title for this reporting page.
Page Description: This is the English text that will display to your end users for the Description of this reporting page.
Page Description (French): This is the French text that will display to your end users for the Description of this reporting page.
Help Topic: This will default as the designated Help File associated with the reporting page.
Export to PDF: This option can be enabled or disabled using the  .
.
Export to Excel: This option can be enabled or disabled using the  .
.
Export to XML: This option can be enabled or disabled using the  .
.
Allow Graphing: This option can be enabled or disabled using the  .
.
Allow Grouping: This option can be enabled or disabled using the  .
.
Allow Pinned Reports: This option can be enabled or disabled using the  .
.
Allow Dynamic Selections: This option can be enabled or disabled using the  .
.
Allow Cross Tabs: This option can be enabled or disabled using the  .
.
By enabling the indicator fields, you are allowing your end users to use the designated functionality of those baseline concepts.
When you have made the necessary changes, click Save  .
.