You can add all the information needed to create a new requisition, including: your contact name and number, the ship-to location, attachments, vendor name, and the date you need the items.
To create the header record for a new requisition:
On the Requisitions menu, click New Requisition. The requisition header record opens.

|
If the Reference field is editable, do one of the following:
Type the reference number, or something that is meaningful to you (up to 8 characters).
Leave it blank, it will be filled in when you click Create Requisition (content set by your institution).
If your institution decides, this field may be overwritten with a default value.
In the Telephone box, type your phone number and Extension.
From the Ship To list, select the destination you want your items shipped to.
In the Building/Room box, type the exact location you want the items delivered to.
|
If your institution uses the system for internal work orders, select whether the Type is a Requisition or Internal Work Order. If Internal Work Order is selected the vendor search results will be limited to your internal departments.
Type allows you to select from: Requisition, PO Change Request or Internal Work Order.
You can select the Attachments check box to advise Purchasing you will send a document by internal mail, for example, a spreadsheet of specifications.
You can select the Quote check box to advise Purchasing you will send a quote from a vendor by internal mail.
In the Selected Vendor box, do one of the following:
Click search
 , type a Vendor
Name or Code,
then click the Search
button.
Type a Vendor name.
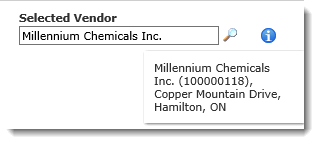
If a Vendor is selected, a small Information icon will be displayed next to the Vendor input field. Hovering your mouse cursor over this field will display a pop-up of the Vendor address. If no Vendor is selected, the icon will be hidden.

|
In the Comments box, type general comments. You can add an unlimited amount of characters.
In the Date Required box, do one of the following to select the date you need the items:
Click the
calendar  (may be limited by your institution's purchasing policy).
Type the date—pause your mouse over the date field to open the list of date formats.
Select a Chart from the list. (Institution specific.)
Select a Currency (optional) from the drop-down list. If this option is disabled at your institution, the currency filter will be hidden.
Click Create Requisition to save the header information. The following happens:
The header record is shaded.
The Requisition number and Created By fields are added above the header record.
A line in the Commodity Items section opens.
At the bottom
of the page, you can click  Attach
Additional Information to send an electronic file or quote with
the requisition.
At the bottom
of the page, you can click  Add/Edit
Requisition Notes to create or read requisition-specific notes.
Do one of the following:
Exit and return later.