
Once you have created one or more Graphs or Grids and once you have created one or more Dashboards, you're ready to begin assembling your Dashboard by adding items to it!
Before you begin, there are a few steps you should understand. Here is the list, and if you've missed anything, click on the Help Topic to read more:
To begin, select the Dashboard Tab from the application you'd like to manage. There could be many Dashboards visible, so be sure to select the correct label. Once you click the Dashboard title, Click Edit Design to enter the Edit Mode:
Once in Edit Mode, if there are already graphs on the current dashboard, those will still display; we can now begin to manage the dashboard by adding graphs to it or re-arranging existing graphs.
On the left hand side, you will see a list of available Graphs to choose from. These are divided into sections: Private and Group. The Private Graphs are those that you have created and not shared; the Group Graphs are those that have been shared with a group (one or more) that you belong to.
Locate, on the list, the first graph you'd like to include on your Dashboard; once you find it, drag and drop it to the Dashboard while in Edit Mode:
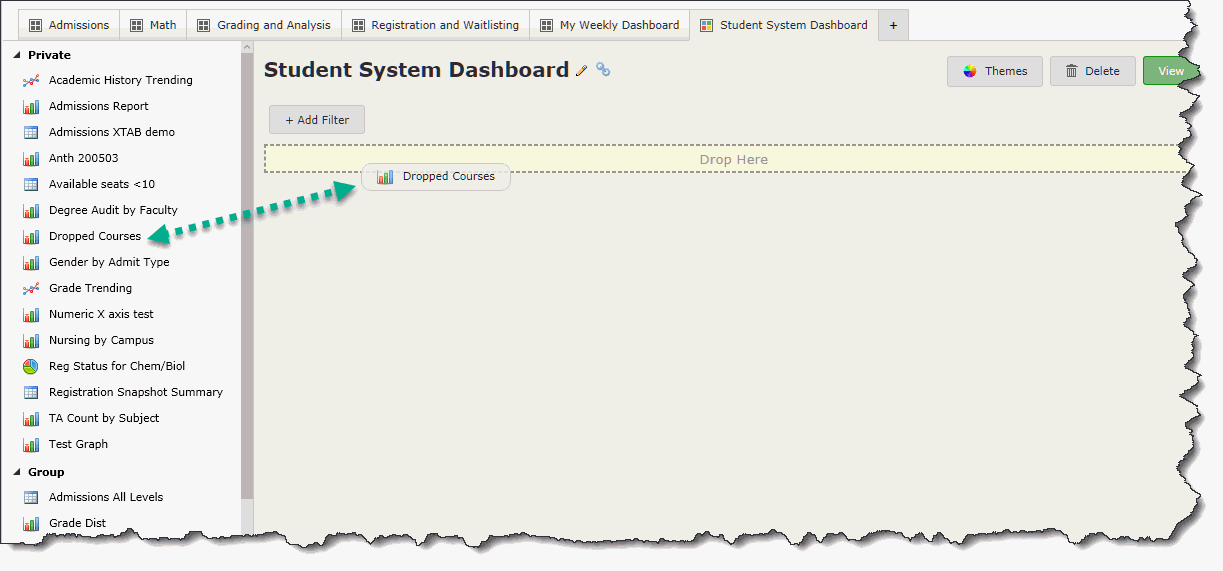
Once you release the Graph to the Dashboard, it will automatically fill the space provided. You can also edit the size and shape before you exit the Edit Mode. To edit the size and shape, simply use your mouse to drag the bottom or side of the graph to the desired size.
Alternatively, you can also use the pre-formatted toolbar with a few popular options (hover over each item to view the pop-up description):
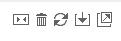
Shrink Horizontally: Will automatically shrink the graph to half the size of the Dashboard and auto-fit the contents
Delete: Remove Graph from Dashboard (this will not delete the Pinned Report or the Graph, rather it will be removed from this Dashboard)
Refresh: Click Refresh to refresh the Graph
Export Graph to PDF
Popout Graph: This allows you to view the graph as a full-screen image
Once you're ready, you can add as many graphs as you like to this Dashboard.
Before you exit the Edit Mode, you may also wish to modify your "Theme" or "Color Palette" for the Dashboard. Although your school may have an institutional default, you can always make changes for your own Dashboards.
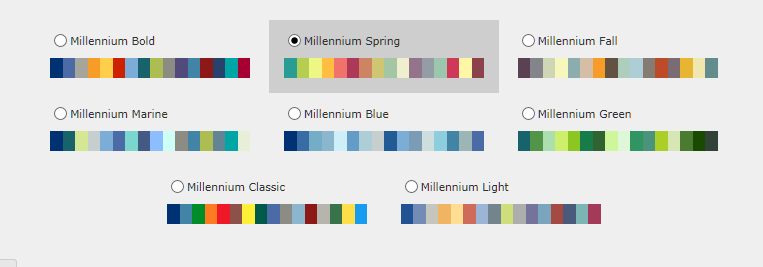
To do this, click on the Themes Button:

A list of pre-defined options will display for you to choose from! These options are configured by the Administrators and may be customized at the Admin level. Once you choose a Theme (or Color Palette), it will be applied to the contents of the entire Dashboard, not to a single Graph:
When you would like to review your changes and take a look at the new Dashboard, click View to exit the Edit Mode and see what has been created!

At any time, you can return to Edit Mode by clicking Edit Design.
Once your Graph is placed on your Dashboard, you can also refine the data being displayed from the Pinned Report by turning off one or more filters on the Graph itself.
Keep in mind that the Graph is going to display all the data (and filters) used in the original Pinned Report. If you would like to refine the Graph to look at less data (and fewer filters), you can easily turn those off right on the Dashboard using the Legend Toggle!
To do this, simply locate the Filters - these will display in your Graph Legend which could be in a number of areas. You will see a list of items that the Graph is currently including. To turn one or more of these filters off, just click them and you will notice the filter display with a subtle white X. The Graph will also re-draw and exclude those filters from the view:
First, let's take a look at a full graph with no exclusion:
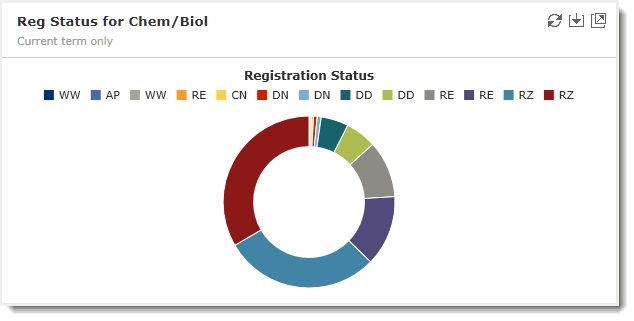
Next, let's eliminate a few filters that we don't want to see right now:

The view (and the graph) is different because you've reduced the number of data series being shown; it all happens behind the scenes and so you only see exactly what you need to!
![]()